Have you ever wanted to receive images directly from space? Recently, I found out that the International Space Station (ISS) occasionally transmits images down to Earth using radio waves, and with a surprisingly simple setup, you can receive them at home. I thought that was pretty cool, so I gave it a try.
At the time of writing, the last ARISS SSTV event took place approximately a week ago. Here’s how I managed to receive images from the ISS and how you can do it too.
The ISS doesn’t constantly send these images, so you’ll need to check the ARISS SSTV event page for future transmissions.
What Is SSTV?
SSTV (Slow Scan Television) is a way to transmit images using audio over radio frequencies. The ISS uses a mode called PD-120, which transmits one image in about 126 seconds. The transmissions are usually sent on 145.800 MHz FM Wide in the 2-meter amateur radio band.
Between images, there’s typically a 2-minute pause, so if you hear silence after receiving one image, that’s normal. The end result is a 640px x 496px image.
My Setup
Baofeng UV-5R
The easiest way to receive SSTV images is to use a cheap handheld radio like the Baofeng UV-5R. I used this with an upgraded antenna - the Nagoya NA-771, which is tuned for 144 MHz (close enough to 145.800 MHz). This made a big difference in signal quality, especially when the ISS was low on the horizon.
To set the frequency, you can use a tool like Chirp to program the radio. Set it to 145.800 MHz. By setting Duplex to Off, you disable transmitting anything accidentally.
It would be beneficial to disable Squelch on the radio. You can do this by setting the squelch level to 0 (the lowest setting). This way, you can hear the beeps even when the signal is weak. A noisy signal is better than no signal at all.
To record the audio, you can simply hold your phone up to the speaker and capture the beeping sound. But for better quality, I connected the Baofeng to my laptop using a 3.5mm AUX cable (Just make sure you use a 4-Pin cable, so that you can actually get the microphone input). This avoids speaker noise (like crackling on noisy signals) and gives you a cleaner signal to decode later. I recorded using Audacity.
When you plug in an AUX cable, the Baofeng mutes its speaker. If you still want to hear what’s being received in real-time (for example, to check if it’s noisy), you can use a tool like Helvum (for Linux) or another audio patch software to route the mic input to your laptop speakers. Audacity also supports input monitoring, but it has a small delay.
RTL-SDR
I also tested an RTL-SDR USB dongle with a computer and software like Gqrx. While it worked, I had trouble getting a strong signal - probably because the antenna I used wasn’t tuned. The Baofeng gave better results overall.
That said, the RTL-SDR does have one advantage: Gpredict can work with Gqrx to automatically adjust the tuning frequency for Doppler shift. I’m not sure this is absolutely necessary for SSTV, but it’s a cool feature.
If you don’t have any of these devices, you can look online for WebSDR receivers that provide this functionality online.
Tracking the ISS
You’ll need to know when the ISS will be overhead in your area. Some apps and tools I used for this:
- ISS Detector (Android)
- Spot the Station (official NASA app)
- Gpredict (Linux)
A typical ISS pass lasts about 10 minutes. When the ISS comes into range and if they are currently sending, you’ll hear a series of beeps and tones - that’s the SSTV signal. A PD-120 image takes a bit over 2 minutes to send. Depending on the timing and pass angle, you might receive one or even two images per pass. If you hear a lot of them over a week, you can even start to recognize each image by the sound they make. You may sometimes need to look in the App for settings to also show daytime passes as most are made for seeing the Station with your eyes, not for radio reception.
During the pass, I kept my antenna pointed toward the ISS’s position using the app’s live tracking. If the signal started getting noisy, I adjusted the antenna’s orientation.
If you hear a noise like this (SSTV Header), it means the SSTV transmission is starting:
Try listening at different times of day to capture different slides.
Decoding the Images
Once you’ve recorded the audio, you can decode it into an image using SSTV software. These are the tools I used:
- Linux: QSSTV
- Windows: MMSSTV
- Android: Robot36
Just keep the program open while recording or use them to decode the recording later. These programs usually auto-detect the PD-120 mode, but if not, you can select it manually.
If you’re using MMSSTV, it needs the audio in a special .mmv format. You can convert your recording using ffmpeg:
| |
Then in MMSSTV, go to “File” → “Play Sound from the file…” and load the .mmv file.
I tested decoding using both phone microphone recordings and direct AUX recordings. The direct connection produced much better results: less background noise and clearer tones.
If your image has green lines, try adjusting the slant setting in the software.
Sharing Your Images
Once you’ve decoded some images, you can share them with the community through the ARISS SSTV Gallery. You can even receive a certificate of participation if you submit during an active event. It’s a fun way to be part of a global amateur radio effort.
Getting a QSL Card
Update: I recently received a QSL card confirming my reception!
If you want a physical memento of the event, you can request a QSL card — a written confirmation of a radio reception. I wanted to send my request directly (Direct) rather than through a bureau.
To find out where to send your report, check the ARISS QSL card page for your region. For Europe, the QSL manager is based in France.
Typically, a direct international QSL request includes a self-addressed envelope (SAE) and either an International Reply Coupon (IRC) or “Green Stamps” (USD cash) to cover return postage. However, Deutsche Post no longer sells IRCs.
Since I was sending to France, I found a workaround: I bought French stamps directly from the La Poste website, printed them out, and glued them onto my return envelope.
I then placed the stamped return envelope inside the main envelope along with my reception report and sent it off.
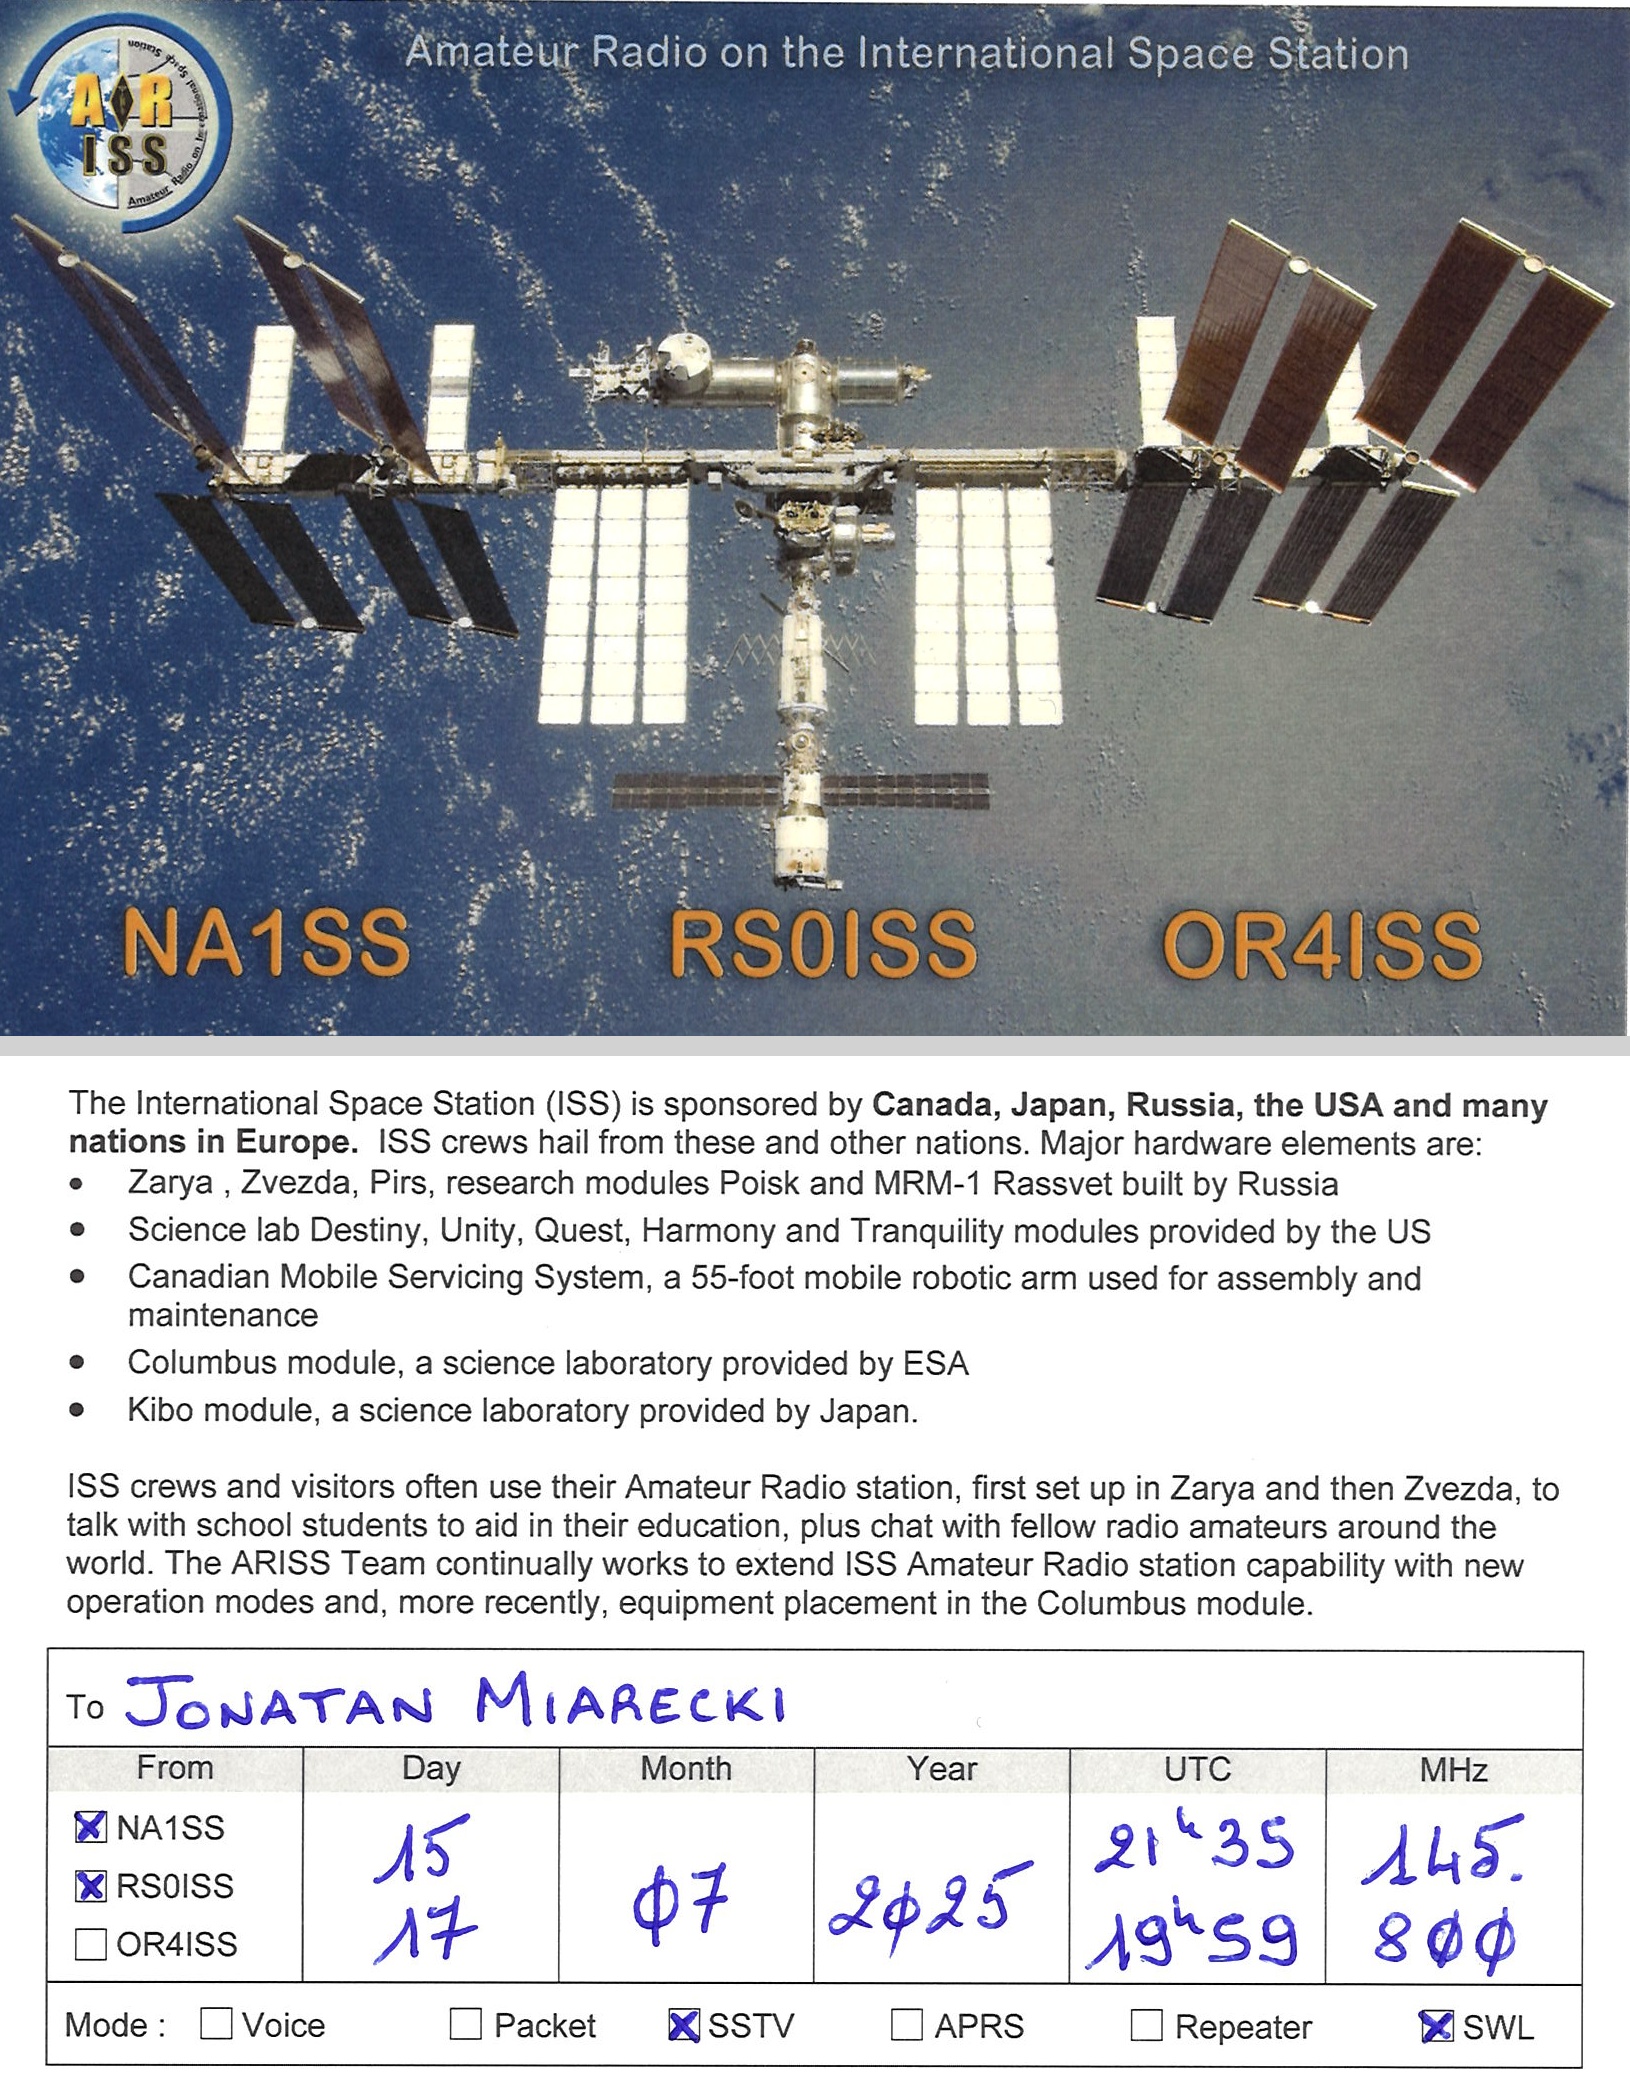
The official QSL card I received. Top: The front of the card featuring the ISS and call signs. Bottom: The back of the card with the handwritten confirmation details.
Image Gallery
Here are some of the images I managed to receive during the July 2025 SSTV event. I included the sound files for each image so you can hear the SSTV tones that were transmitted.
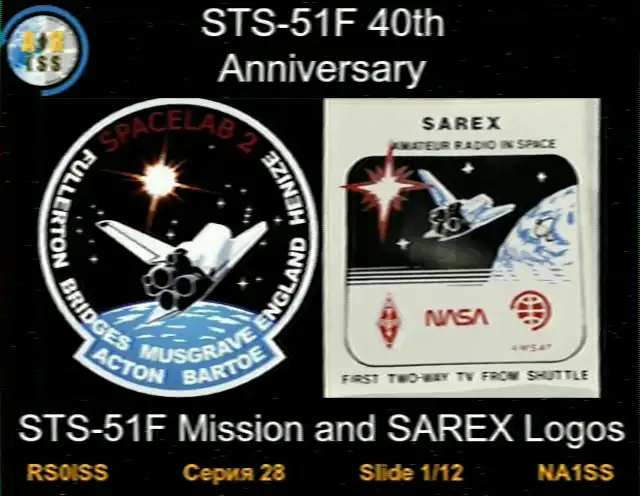
Slide 1/12 - Sound file
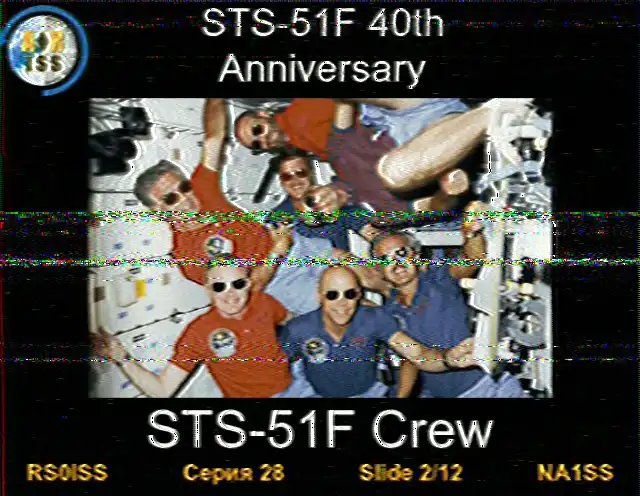
Slide 2/12 - Sound file
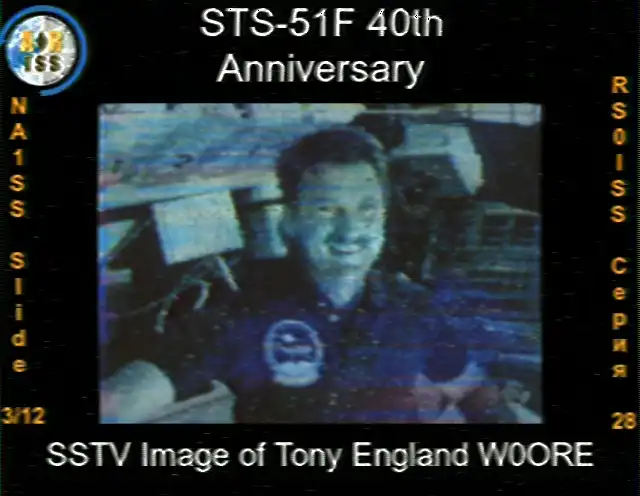
Slide 3/12 - Sound file

Slide 9/12 - Sound file
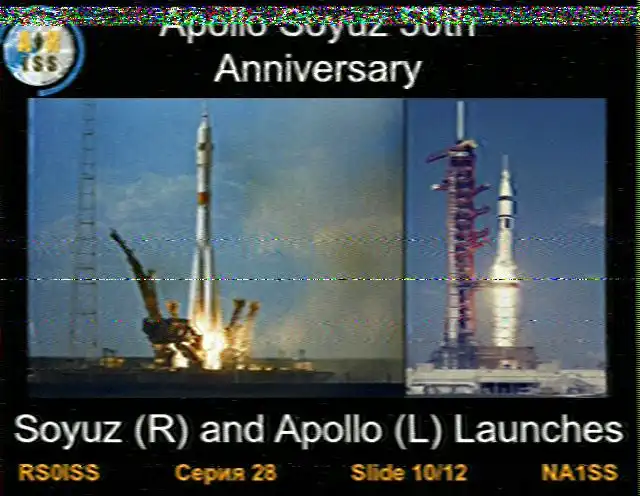
Slide 10/12
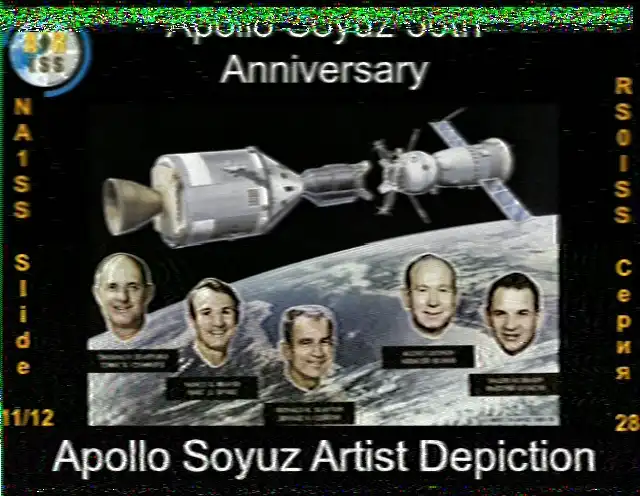
Slide 11/12